- tyler@kirail.com
- +86 15603721115
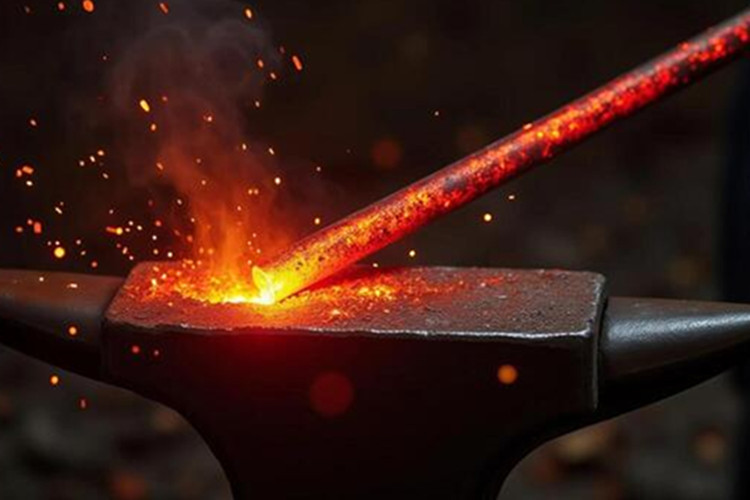
Blacksmithing is a traditional craft that shapes metal—primarily iron and steel—using localized heating, hammering, and an anvil. Unlike industrial drop forging, blacksmithing relies heavily on manual skill; the blacksmith must judge the metal's temperature by its color and work the material while it is in a malleable, semi-molten state.
The following is a comprehensive overview of blacksmithing forges and the core techniques of the craft.
Types of Blacksmith Forges
The forge is the "engine" of the blacksmith shop; its function is to generate and concentrate enough heat to bring the metal to a workable temperature (typically between 1,500°F and 2,300°F, or 815°C and 1,260°C, depending on the metal type and the specific operation).
1. Coal/Coke Forge (Traditional)
* How it works: It burns "coke"—a processed fuel derived from coal that is purer, burns hotter, and contains fewer impurities. Air is forced through a tuyère (air inlet pipe) into the firepot, creating a concentrated, extremely high-temperature combustion core.
* Advantages: It creates a reducing atmosphere (an area with limited oxygen) around the metal, preventing the formation of iron oxide (scale). It is ideal for heating specific, localized areas of large metal workpieces.
* Disadvantages: It requires advanced fire-management skills; produces smoke and fumes; and necessitates regular maintenance (such as clearing out clinkers or slag).
2. Gas Forge (Propane or Natural Gas) (Modern Standard)
* How it works: It uses one or more Venturi burners or forced-air burners to mix gas with air, projecting the flame into an insulated chamber lined with refractory materials (such as ceramic fiber blankets or castable refractory).
* Advantages: Clean, quiet, and highly consistent in performance. The temperature is easy to control, and physical maintenance requirements are lower compared to coal forges. It is highly suitable for beginners and batch production operations.
* Disadvantages: It creates an oxidizing atmosphere; if the flame is not properly adjusted to a slightly "fuel-rich" state, scale (flaky rust) may form on the metal surface. It is less efficient for heating very small, localized areas on large metal workpieces.
3. Electric Forging Furnace
* Working Principle: Uses resistive heating elements (similar to a kiln) to heat the metal to the desired temperature.
* Advantages: Very clean, offers precise temperature control (usually equipped with digital controllers), and is safe for indoor use.
* Disadvantages: Heats up slowly, has a limited maximum temperature, and is generally unsuitable for traditional dynamic forging processes. It is primarily used for heat treatment (annealing, quenching, tempering) rather than active shaping.
Core Forging Techniques
Forging is essentially a combination of physical movements. Blacksmiths create complex objects by combining these basic techniques.
1. Drawing Out
* Goal: To make the metal piece longer and thinner.
* Method: After heating the metal, hammer it on the flat surface of the anvil or use a cross-peen hammer. The force of the hammer blows causes the metal to extend in the direction perpendicular to the strike.
2. Upsetting
* Goal: To make the metal piece shorter and thicker (the exact opposite of drawing out).
* Method: Heat the metal and compress it. Specific methods include holding the metal rod vertically and hammering the top end, or bracing the heated end against a solid surface while hammering the side. This process is often used to gather material before forging a head (such as the head of a nail or chisel).
3. Bending
* Goal: To change the angle or shape of the metal.
* Method: Place the heated metal on the edge or horn (the conical tip) of the anvil and bend it to the desired curvature or angle using a hammer or leverage.
4. Punching
* Objective: To create a hole in the metal.
* Method: Drive a tapered steel tool (a punch) partially into the heated metal. Then, flip the workpiece over and continue driving the punch from the opposite side to complete the hole. This method prevents tearing the metal and creates a clean-edged, hourglass-shaped hole. This operation is typically performed over the anvil's round hole (the pritchel hole) to allow the punch to pass through.
5. Drifting
* Objective: To enlarge, shape, or refine a punched hole.
* Method: Hammer a tapered, smooth-surfaced tool known as a "drift" through the previously punched hole. Unlike a standard punch, a drift does not cut away metal; instead, it displaces the metal by compression, expanding the hole to a precise size or shape (e.g., enlarging a round hole into an oval to form a hammer eye).
6. Twisting
* Objective: To create decorative spiral patterns.
* Method: Heat a section of the metal to a bright orange-yellow. Securely clamp one end in a bench vise or hold it with a wrench, then grip the other end with pliers and rotate it. The metal must be at the correct temperature: too low, and it may crack; too high, and it may break or burn.
7. Forge Welding
* Objective: To permanently fuse two separate pieces of metal into one.
* Procedure: Clean the contact surfaces to be welded and heat them to a "welding temperature" near the melting point (appearing as a bright yellow-white; for steel, this is approximately 2300°F / 1260°C). Flux (such as borax) is sometimes applied to dissolve scale and prevent oxidation. The workpieces are then quickly removed from the forge and struck rapidly with a heavy hammer to fuse the two parts together.
Heat Treatment (Final Step)
While forging shapes the metal, heat treatment determines its final mechanical properties.
1. Annealing: Heating the metal and allowing it to cool slowly; this softens the metal, making it easier to machine or file.
2. Hardening/Quenching: Heating the steel to its critical temperature (the point at which it loses its magnetism) and then rapidly cooling it in oil, water, or brine. This process locks in the crystalline structure, making the steel extremely hard but also brittle.
3. Tempering: Reheating the hardened steel to a lower temperature (typically 350°F–450°F / 175°C–230°C—often gauged by the color of the oxide layer forming on the polished metal surface, such as straw-yellow or blue) to relieve internal stresses. This step sacrifices a small amount of hardness to gain essential toughness, preventing the tool from shattering upon impact.
Key Tools for These Processes
1. Anvil: The primary work surface. Made of forged or cast steel, it provides a hard, resilient platform. Key features include the face (flat top), the horn (for bending), the hardy hole (square hole for mounting tools), and the pritchel hole (round hole for punching operations).
2. Hammers: Hammers used for general work typically range in weight from 1.5 pounds to over 3 pounds. The cross-peen hammer is the most versatile type, suitable for both elongating metal and general striking tasks.
3. Tongs: Used for gripping hot metal. They come in a variety of jaw shapes (such as flat-jaw, wolf-jaw, and box-jaw tongs), each designed to securely hold specific metal profiles.
4. Striking and forming tools: These include fullers (for creating grooves), chisels (for hot or cold work), and swages (for shaping round or square cross-sections).
Conclusion
Today, forging remains a vibrant craft that blends ancient techniques with modern metallurgy. Whether creating custom knives, architectural ironwork, or historical reproductions, the fundamental interplay between fire, steel, and the hammer remains unchanged.

